layout: docs title: “Prompts” —
Prompts
- Introduction
- Installation
- Available Prompts
- Transforming Input Before Validation
- Forms
- Informational Messages
- Callouts
- Tables
- Spin
- Progress Bar
- Task
- Stream
- Terminal Title
- Clearing the Terminal
- Terminal Considerations
- Unsupported Environments and Fallbacks
- Testing
Introduction
Laravel Prompts is a PHP package for adding beautiful and user-friendly forms to your command-line applications, with browser-like features including placeholder text and validation.
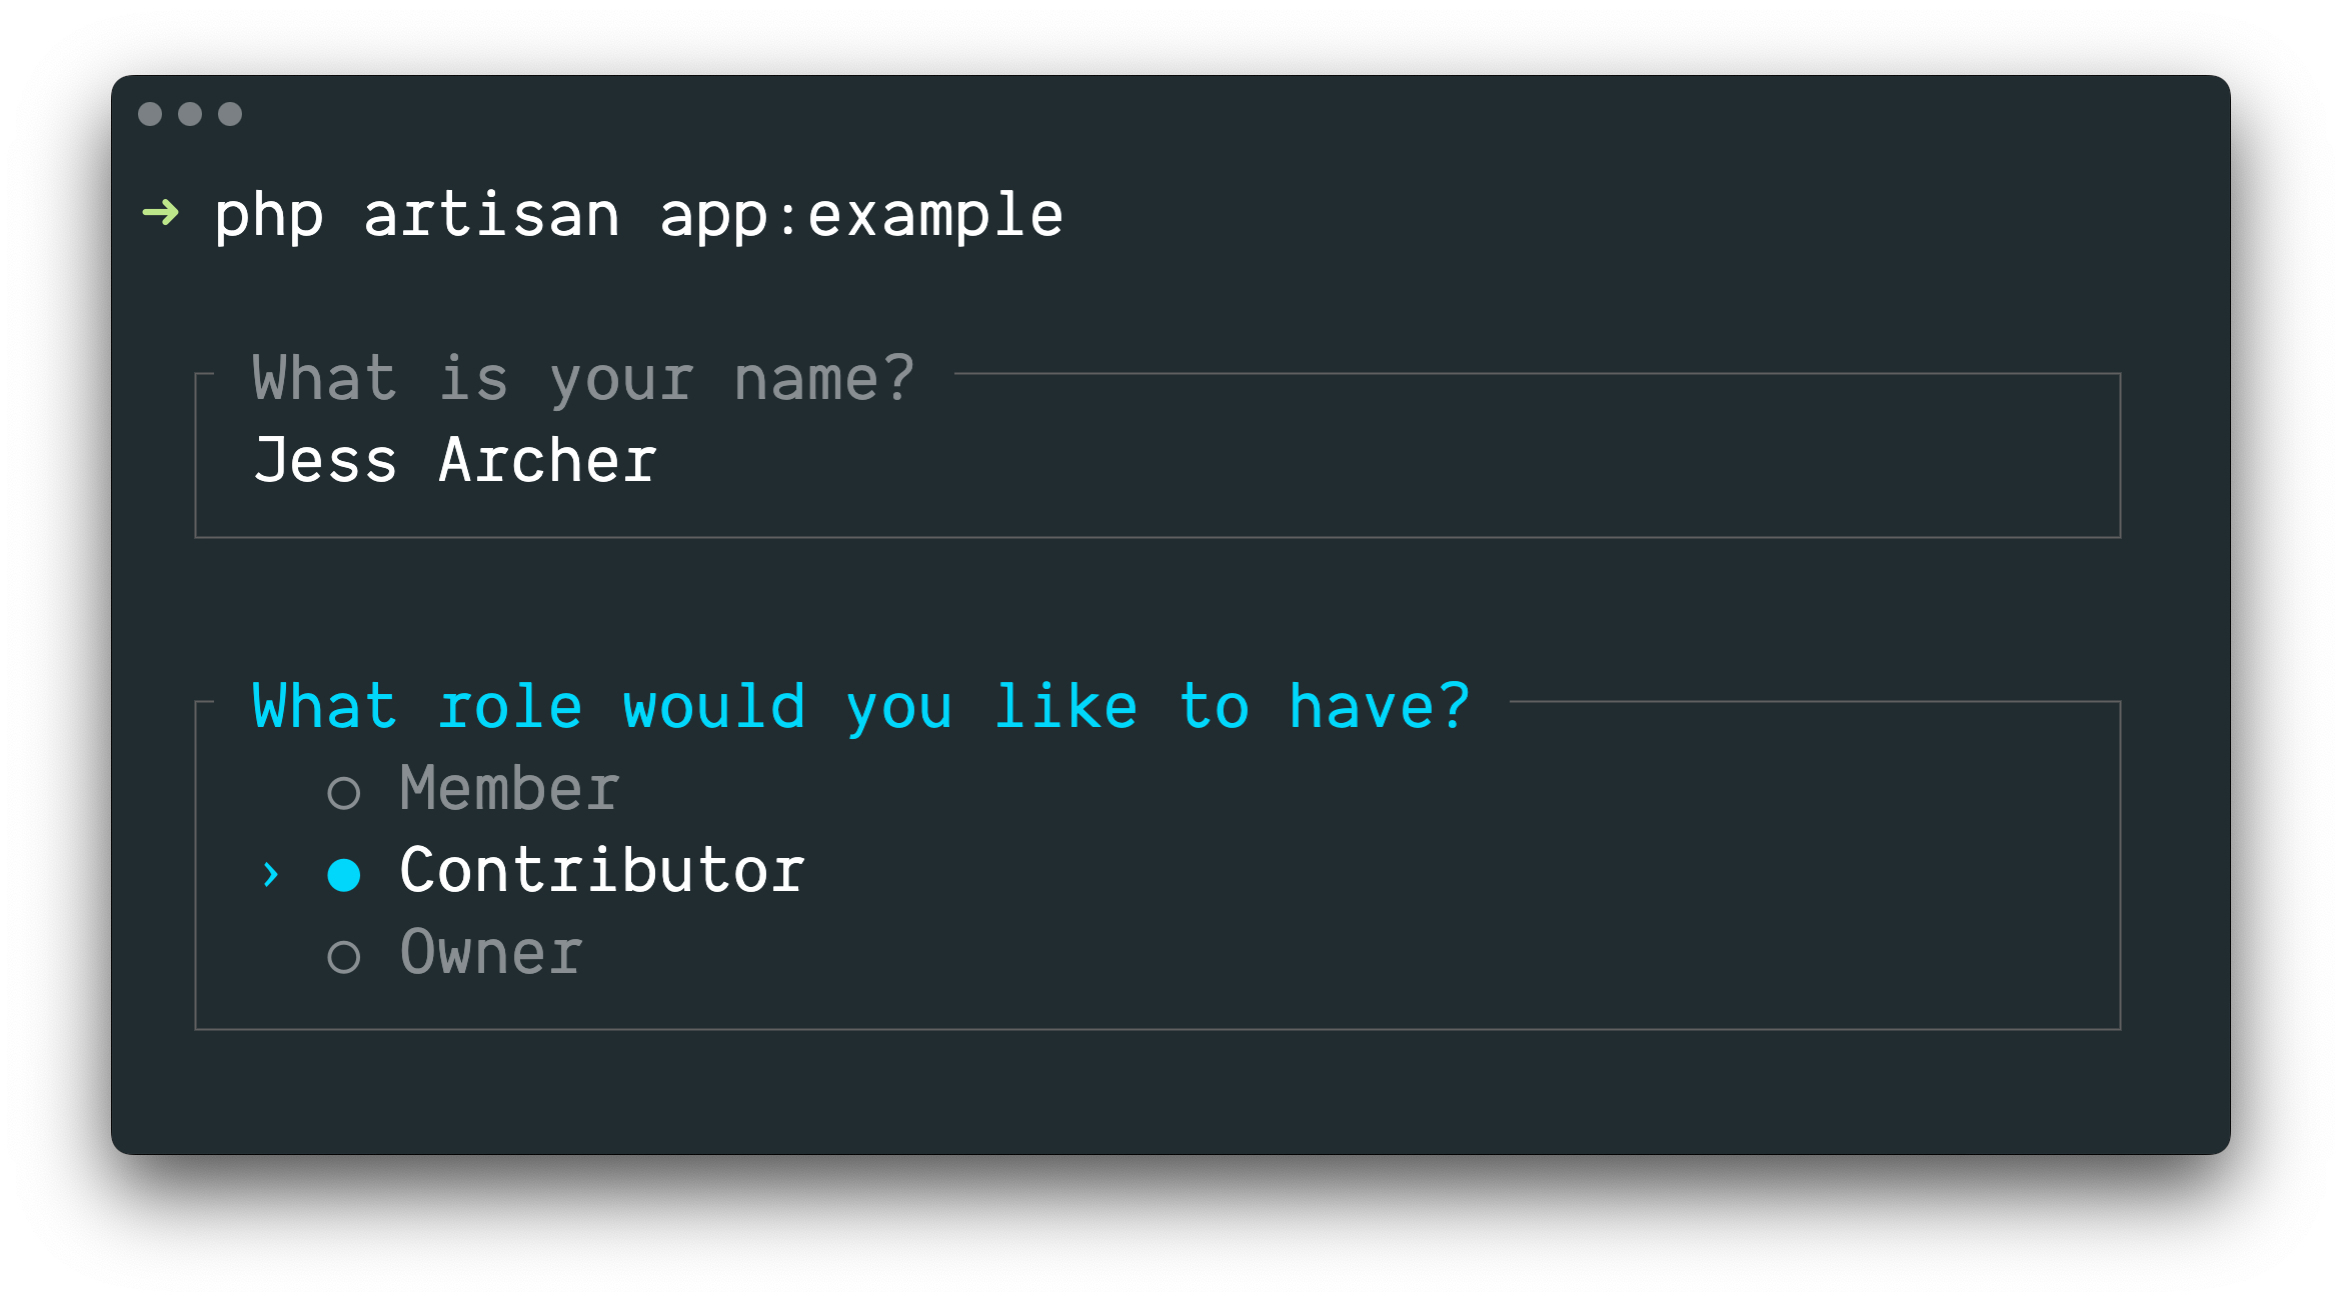
Laravel Prompts is perfect for accepting user input in your Artisan console commands, but it may also be used in any command-line PHP project.
[!NOTE] Laravel Prompts supports macOS, Linux, and Windows with WSL. For more information, please see our documentation on unsupported environments & fallbacks.
Installation
Laravel Prompts is already included with the latest release of Laravel.
Laravel Prompts may also be installed in your other PHP projects by using the Composer package manager:
composer require laravel/prompts
사용 가능한 프롬프트
텍스트
text 함수는 사용자에게 주어진 질문을 표시하고, 사용자의 입력을 받아서 그것을 반환합니다:
use function Laravel\Prompts\text;

$name = text('What is your name?');
자리 표시자 텍스트, 기본값 및 정보 제공 힌트를 포함할 수도 있습니다:
$name = text(
    label: 'What is your name?',
    placeholder: 'E.g. Taylor Otwell',
    default: $user?->name,
    hint: 'This will be displayed on your profile.'
);
필수 값
값을 입력해야 하는 경우, required 인수를 전달할 수 있습니다:
$name = text(
    label: 'What is your name?',
    required: true
);
검증 메시지를 사용자 정의하고 싶다면 문자열을 전달할 수도 있습니다:
$name = text(
    label: 'What is your name?',
    required: 'Your name is required.'
);
추가 검증
마지막으로, 추가 검증 로직을 수행하고 싶다면 validate 인수에 클로저를 전달할 수 있습니다:
$name = text(
    label: 'What is your name?',
    validate: fn (string $value) => match (true) {
        strlen($value) < 3 => 'The name must be at least 3 characters.',
        strlen($value) > 255 => 'The name must not exceed 255 characters.',
        default => null
    }
);
클로저는 입력된 값을 받게 되며, 오류 메시지를 반환할 수도 있고, 검증이 통과하면 null를 반환할 수도 있습니다.
또는 Laravel의 validator의 기능을 활용할 수도 있습니다. 그렇게 하려면 validate 인수에 속성 이름과 원하는 검증 규칙을 포함한 배열을 제공하면 됩니다:
$name = text(
    label: 'What is your name?',
    validate: ['name' => 'required|max:255|unique:users']
);
텍스트 영역
textarea 함수는 사용자에게 주어진 질문을 표시하고, 다중 행 텍스트 영역을 통해 입력을 받아서 반환합니다:
use function Laravel\Prompts\textarea;

$story = textarea('Tell me a story.');
자리 표시자 텍스트, 기본값 및 정보 제공 힌트를 포함할 수도 있습니다:
$story = textarea(
    label: 'Tell me a story.',
    placeholder: 'This is a story about...',
    hint: 'This will be displayed on your profile.'
);
필수 값
값을 입력해야 하는 경우, required 인수를 전달할 수 있습니다:
$story = textarea(
    label: 'Tell me a story.',
    required: true
);
검증 메시지를 사용자 정의하고 싶다면 문자열을 전달할 수도 있습니다:
$story = textarea(
    label: 'Tell me a story.',
    required: 'A story is required.'
);
추가 검증
마지막으로, 추가 검증 로직을 수행하고 싶다면 validate 인수에 클로저를 전달할 수 있습니다:
$story = textarea(
    label: 'Tell me a story.',
    validate: fn (string $value) => match (true) {
        strlen($value) < 250 => 'The story must be at least 250 characters.',
        strlen($value) > 10000 => 'The story must not exceed 10,000 characters.',
        default => null
    }
);
클로저는 입력된 값을 받게 되며, 오류 메시지를 반환할 수도 있고, 검증이 통과하면 null를 반환할 수도 있습니다.
또는 Laravel의 validator의 기능을 활용할 수도 있습니다. 그렇게 하려면 validate 인수에 속성 이름과 원하는 검증 규칙을 포함한 배열을 제공하면 됩니다:
$story = textarea(
    label: 'Tell me a story.',
    validate: ['story' => 'required|max:10000']
);
숫자
number 함수는 주어진 질문으로 사용자에게 프롬프트를 표시하고, 사용자의 숫자 입력을 받아서 반환합니다. number 함수는 사용자가 위쪽 및 아래쪽 화살표 키를 사용하여 숫자를 조작할 수 있도록 합니다:
use function Laravel\Prompts\number;

$number = number('How many copies would you like?');
자리 표시자 텍스트, 기본값 및 정보 제공 힌트를 포함할 수도 있습니다:
$name = number(
    label: 'How many copies would you like?',
    placeholder: '5',
    default: 1,
    hint: 'This will be determine how many copies to create.'
);
필수 값
값을 입력해야 하는 경우, required 인수를 전달할 수 있습니다:
$copies = number(
    label: 'How many copies would you like?',
    required: true
);
검증 메시지를 사용자 정의하고 싶다면 문자열을 전달할 수도 있습니다:
$copies = number(
    label: 'How many copies would you like?',
    required: 'A number of copies is required.'
);
추가 검증
마지막으로, 추가 검증 로직을 수행하고 싶다면 validate 인수에 클로저를 전달할 수 있습니다:
$copies = number(
    label: 'How many copies would you like?',
    validate: fn (?int $value) => match (true) {
        $value < 1 => 'At least one copy is required.',
        $value > 100 => 'You may not create more than 100 copies.',
        default => null
    }
);
클로저는 입력된 값을 받게 되며, 오류 메시지를 반환하거나 검증이 통과하면 null를 반환할 수 있습니다.
또는 Laravel의 validator의 기능을 활용할 수도 있습니다. 이를 위해 validate 인수에 속성 이름과 원하는 검증 규칙을 포함한 배열을 제공하십시오:
$copies = number(
    label: 'How many copies would you like?',
    validate: ['copies' => 'required|integer|min:1|max:100']
);
비밀번호
password 함수는 text 함수와 유사하지만, 사용자가 콘솔에 입력할 때 입력 내용이 가려집니다. 이는 비밀번호와 같은 민감한 정보를 요청할 때 유용합니다:
use function Laravel\Prompts\password;

$password = password('What is your password?');
자리 표시자 텍스트와 정보 힌트를 포함할 수도 있습니다:
$password = password(
    label: 'What is your password?',
    placeholder: 'password',
    hint: 'Minimum 8 characters.'
);
필수 값
값을 입력해야 하는 경우, required 인수를 전달할 수 있습니다:
$password = password(
    label: 'What is your password?',
    required: true
);
검증 메시지를 사용자 정의하고 싶다면 문자열을 전달할 수도 있습니다:
$password = password(
    label: 'What is your password?',
    required: 'The password is required.'
);
추가 검증
마지막으로, 추가 검증 로직을 수행하고 싶다면 validate 인수에 클로저를 전달할 수 있습니다:
$password = password(
    label: 'What is your password?',
    validate: fn (string $value) => match (true) {
        strlen($value) < 8 => 'The password must be at least 8 characters.',
        default => null
    }
);
클로저는 입력된 값을 받게 되며, 오류 메시지를 반환할 수도 있고, 검증이 통과하면 null를 반환할 수도 있습니다.
또는 Laravel의 validator의 기능을 활용할 수도 있습니다. 그렇게 하려면 validate 인수에 속성 이름과 원하는 검증 규칙을 포함한 배열을 제공하면 됩니다:
$password = password(
    label: 'What is your password?',
    validate: ['password' => 'min:8']
);
확인
사용자에게 ‘예 또는 아니오’ 확인을 요청해야 하는 경우, confirm 함수를 사용할 수 있습니다. 사용자는 화살표 키를 사용하거나 y 또는 n를 눌러 응답을 선택할 수 있습니다. 이 함수는 true 또는 false 중 하나를 반환합니다.
use function Laravel\Prompts\confirm;

$confirmed = confirm('Do you accept the terms?');
기본값, ‘예’와 ‘아니요’ 레이블에 대한 맞춤 문구, 그리고 정보 제공용 힌트도 포함할 수 있습니다:
$confirmed = confirm(
    label: 'Do you accept the terms?',
    default: false,
    yes: 'I accept',
    no: 'I decline',
    hint: 'The terms must be accepted to continue.'
);
“예” 필요
필요한 경우, required 인수를 전달하여 사용자가 “예”를 선택하도록 요구할 수 있습니다:
$confirmed = confirm(
    label: 'Do you accept the terms?',
    required: true
);
검증 메시지를 사용자 정의하고 싶다면 문자열을 전달할 수도 있습니다:
$confirmed = confirm(
    label: 'Do you accept the terms?',
    required: 'You must accept the terms to continue.'
);
선택
사용자가 미리 정의된 선택 항목 중에서 선택해야 하는 경우, select 함수를 사용할 수 있습니다:
use function Laravel\Prompts\select;

$role = select(
    label: 'What role should the user have?',
    options: ['Member', 'Contributor', 'Owner']
);
기본 선택과 정보 힌트도 지정할 수 있습니다:
$role = select(
    label: 'What role should the user have?',
    options: ['Member', 'Contributor', 'Owner'],
    default: 'Owner',
    hint: 'The role may be changed at any time.'
);
선택된 값을 반환하는 대신 선택된 키가 반환되도록 options 인수에 연관 배열을 전달할 수도 있습니다:
$role = select(
    label: 'What role should the user have?',
    options: [
        'member' => 'Member',
        'contributor' => 'Contributor',
        'owner' => 'Owner',
    ],
    default: 'owner'
);
목록이 스크롤되기 시작하기 전에 최대 다섯 가지 옵션이 표시됩니다. scroll 인수를 전달하여 이를 사용자 지정할 수 있습니다:
$role = select(
    label: 'Which category would you like to assign?',
    options: Category::pluck('name', 'id'),
    scroll: 10
);
부가 정보
info 인수는 현재 강조 표시된 옵션에 대한 추가 정보를 표시하는 데 사용할 수 있습니다. 클로저가 제공되면, 클로저는 현재 강조 표시된 옵션의 값을 받고 문자열 또는 null를 반환해야 합니다:
$role = select(
    label: 'What role should the user have?',
    options: [
        'member' => 'Member',
        'contributor' => 'Contributor',
        'owner' => 'Owner',
    ],
    info: fn (string $value) => match ($value) {
        'member' => 'Can view and comment.',
        'contributor' => 'Can view, comment, and edit.',
        'owner' => 'Full access to all resources.',
        default => null,
    }
);
정보가 강조된 옵션에 따라 달라지지 않는 경우, info 인수에 정적 문자열을 전달할 수도 있습니다:
$role = select(
    label: 'What role should the user have?',
    options: ['Member', 'Contributor', 'Owner'],
    info: 'The role may be changed at any time.'
);
추가 검증
다른 프롬프트 함수와 달리 select 함수는 아무 것도 선택할 수 없기 때문에 required 인수를 허용하지 않습니다. 그러나 옵션을 제시해야 하지만 선택되지 않도록 방지해야 하는 경우 validate 인수에 클로저를 전달할 수 있습니다:
$role = select(
    label: 'What role should the user have?',
    options: [
        'member' => 'Member',
        'contributor' => 'Contributor',
        'owner' => 'Owner',
    ],
    validate: fn (string $value) =>
        $value === 'owner' && User::where('role', 'owner')->exists()
            ? 'An owner already exists.'
            : null
);
만약 options 인수가 연관 배열이라면, 해당 클로저는 선택된 키를 받게 되며, 그렇지 않으면 선택된 값을 받게 됩니다. 클로저는 오류 메시지를 반환할 수도 있고, 검증이 통과하면 null를 반환할 수도 있습니다.
다중 선택
사용자가 여러 옵션을 선택할 수 있도록 해야 하는 경우, multiselect 함수를 사용할 수 있습니다:
use function Laravel\Prompts\multiselect;

$permissions = multiselect(
    label: 'What permissions should be assigned?',
    options: ['Read', 'Create', 'Update', 'Delete']
);
기본 선택 사항과 정보 힌트도 지정할 수 있습니다:
use function Laravel\Prompts\multiselect;

$permissions = multiselect(
    label: 'What permissions should be assigned?',
    options: ['Read', 'Create', 'Update', 'Delete'],
    default: ['Read', 'Create'],
    hint: 'Permissions may be updated at any time.'
);
선택한 옵션의 값을 반환하는 대신 키를 반환하려면 options 인수에 연관 배열을 전달할 수도 있습니다:
$permissions = multiselect(
    label: 'What permissions should be assigned?',
    options: [
        'read' => 'Read',
        'create' => 'Create',
        'update' => 'Update',
        'delete' => 'Delete',
    ],
    default: ['read', 'create']
);
목록이 스크롤되기 시작하기 전에 최대 다섯 가지 옵션이 표시됩니다. scroll 인수를 전달하여 이를 사용자 지정할 수 있습니다:
$categories = multiselect(
    label: 'What categories should be assigned?',
    options: Category::pluck('name', 'id'),
    scroll: 10
);
부가 정보
info 인수는 현재 강조 표시된 옵션에 대한 추가 정보를 표시하는 데 사용할 수 있습니다. 클로저가 제공되면, 해당 클로저는 현재 강조 표시된 옵션의 값을 받아 문자열 또는 null를 반환해야 합니다:
$permissions = multiselect(
    label: 'What permissions should be assigned?',
    options: [
        'read' => 'Read',
        'create' => 'Create',
        'update' => 'Update',
        'delete' => 'Delete',
    ],
    info: fn (string $value) => match ($value) {
        'read' => 'View resources and their properties.',
        'create' => 'Create new resources.',
        'update' => 'Modify existing resources.',
        'delete' => 'Permanently remove resources.',
        default => null,
    }
);
값을 요구함
기본적으로 사용자는 하나 이상의 옵션을 선택할 수 있습니다. 대신 하나 이상의 옵션을 강제하려면 required 인수를 전달할 수 있습니다:
$categories = multiselect(
    label: 'What categories should be assigned?',
    options: Category::pluck('name', 'id'),
    required: true
);
검증 메시지를 사용자 정의하고 싶다면, required 인수에 문자열을 제공할 수 있습니다:
$categories = multiselect(
    label: 'What categories should be assigned?',
    options: Category::pluck('name', 'id'),
    required: 'You must select at least one category'
);
추가 검증
선택지를 제시하되 선택되지 않도록 해야 하는 경우, validate 인수에 클로저를 전달할 수 있습니다:
$permissions = multiselect(
    label: 'What permissions should the user have?',
    options: [
        'read' => 'Read',
        'create' => 'Create',
        'update' => 'Update',
        'delete' => 'Delete',
    ],
    validate: fn (array $values) => ! in_array('read', $values)
        ? 'All users require the read permission.'
        : null
);
만약 options 인수가 연관 배열이면 클로저는 선택된 키를 받고, 그렇지 않으면 선택된 값을 받습니다. 클로저는 오류 메시지를 반환할 수도 있고, 검증이 통과하면 null를 반환할 수 있습니다.
제안
suggest 함수는 가능한 선택지에 대한 자동 완성을 제공하는 데 사용될 수 있습니다. 사용자는 자동 완성 힌트와 상관없이 여전히 어떤 답변도 제공할 수 있습니다:
use function Laravel\Prompts\suggest;

$name = suggest('What is your name?', ['Taylor', 'Dayle']);
또는 suggest 함수의 두 번째 인수로 클로저를 전달할 수 있습니다. 사용자가 입력 문자를 입력할 때마다 클로저가 호출됩니다. 클로저는 지금까지 사용자가 입력한 내용을 포함하는 문자열 매개변수를 받아야 하며 자동 완성 옵션의 배열을 반환해야 합니다:
$name = suggest(
    label: 'What is your name?',
    options: fn ($value) => collect(['Taylor', 'Dayle'])
        ->filter(fn ($name) => Str::contains($name, $value, ignoreCase: true))
);
자리 표시자 텍스트, 기본값 및 정보 제공 힌트를 포함할 수도 있습니다:
$name = suggest(
    label: 'What is your name?',
    options: ['Taylor', 'Dayle'],
    placeholder: 'E.g. Taylor',
    default: $user?->name,
    hint: 'This will be displayed on your profile.'
);
부가 정보
info 인수는 현재 강조 표시된 옵션에 대한 추가 정보를 표시하는 데 사용할 수 있습니다. 클로저가 제공되면, 해당 클로저는 현재 강조 표시된 옵션의 값을 받아 문자열 또는 null를 반환해야 합니다:
$name = suggest(
    label: 'What is your name?',
    options: ['Taylor', 'Dayle'],
    info: fn (string $value) => match ($value) {
        'Taylor' => 'Administrator',
        'Dayle' => 'Contributor',
        default => null,
    }
);
필수 값
값을 입력해야 하는 경우, required 인수를 전달할 수 있습니다:
$name = suggest(
    label: 'What is your name?',
    options: ['Taylor', 'Dayle'],
    required: true
);
검증 메시지를 사용자 정의하고 싶다면 문자열을 전달할 수도 있습니다:
$name = suggest(
    label: 'What is your name?',
    options: ['Taylor', 'Dayle'],
    required: 'Your name is required.'
);
추가 검증
마지막으로, 추가 검증 로직을 수행하고 싶다면 validate 인수에 클로저를 전달할 수 있습니다:
$name = suggest(
    label: 'What is your name?',
    options: ['Taylor', 'Dayle'],
    validate: fn (string $value) => match (true) {
        strlen($value) < 3 => 'The name must be at least 3 characters.',
        strlen($value) > 255 => 'The name must not exceed 255 characters.',
        default => null
    }
);
클로저는 입력된 값을 받게 되며, 오류 메시지를 반환할 수도 있고, 검증이 통과하면 null를 반환할 수도 있습니다.
또는 Laravel의 validator의 기능을 활용할 수도 있습니다. 그렇게 하려면 validate 인수에 속성 이름과 원하는 검증 규칙을 포함한 배열을 제공하면 됩니다:
$name = suggest(
    label: 'What is your name?',
    options: ['Taylor', 'Dayle'],
    validate: ['name' => 'required|min:3|max:255']
);
검색
사용자가 선택할 수 있는 옵션이 많은 경우, search 함수는 사용자가 화살표 키를 사용하여 옵션을 선택하기 전에 검색 쿼리를 입력하여 결과를 필터링할 수 있도록 합니다:
use function Laravel\Prompts\search;

$id = search(
    label: 'Search for the user that should receive the mail',
    options: fn (string $value) => strlen($value) > 0
        ? User::whereLike('name', "%{$value}%")->pluck('name', 'id')->all()
        : []
);
클로저는 사용자가 지금까지 입력한 텍스트를 받아야 하며 옵션 배열을 반환해야 합니다. 연관 배열을 반환하면 선택된 옵션의 키가 반환되고, 그렇지 않으면 그 값이 대신 반환됩니다.
값을 반환하려는 배열을 필터링할 때는 배열이 연관 배열이 되지 않도록 array_values 함수나 values 컬렉션 메서드를 사용해야 합니다:
$names = collect(['Taylor', 'Abigail']);

$selected = search(
    label: 'Search for the user that should receive the mail',
    options: fn (string $value) => $names
        ->filter(fn ($name) => Str::contains($name, $value, ignoreCase: true))
        ->values()
        ->all(),
);
자리 표시자 텍스트와 정보 힌트를 포함할 수도 있습니다:
$id = search(
    label: 'Search for the user that should receive the mail',
    placeholder: 'E.g. Taylor Otwell',
    options: fn (string $value) => strlen($value) > 0
        ? User::whereLike('name', "%{$value}%")->pluck('name', 'id')->all()
        : [],
    hint: 'The user will receive an email immediately.'
);
목록이 스크롤되기 시작하기 전에 최대 다섯 가지 옵션이 표시됩니다. scroll 인수를 전달하여 이를 사용자 지정할 수 있습니다:
$id = search(
    label: 'Search for the user that should receive the mail',
    options: fn (string $value) => strlen($value) > 0
        ? User::whereLike('name', "%{$value}%")->pluck('name', 'id')->all()
        : [],
    scroll: 10
);
부가 정보
info 인수는 현재 강조 표시된 옵션에 대한 추가 정보를 표시하는 데 사용할 수 있습니다. 클로저가 제공되면, 해당 클로저는 현재 강조 표시된 옵션의 값을 받아 문자열 또는 null를 반환해야 합니다:
$id = search(
    label: 'Search for the user that should receive the mail',
    options: fn (string $value) => strlen($value) > 0
        ? User::whereLike('name', "%{$value}%")->pluck('name', 'id')->all()
        : [],
    info: fn (int $userId) => User::find($userId)?->email
);
추가 검증
추가 검증 로직을 수행하고 싶다면, validate 인수에 클로저를 전달할 수 있습니다:
$id = search(
    label: 'Search for the user that should receive the mail',
    options: fn (string $value) => strlen($value) > 0
        ? User::whereLike('name', "%{$value}%")->pluck('name', 'id')->all()
        : [],
    validate: function (int|string $value) {
        $user = User::findOrFail($value);

        if ($user->opted_out) {
            return 'This user has opted-out of receiving mail.';
        }
    }
);
만약 options 클로저가 연관 배열을 반환하면, 클로저는 선택된 키를 받게 되며, 그렇지 않으면 선택된 값을 받게 됩니다. 클로저는 오류 메시지를 반환할 수도 있고, 검증이 통과하면 null를 반환할 수도 있습니다.
다중 검색
검색 가능한 옵션이 많고 사용자가 여러 항목을 선택할 수 있어야 하는 경우, multisearch 함수는 사용자가 검색 쿼리를 입력하여 결과를 필터링한 후 화살표 키와 스페이스바를 사용하여 옵션을 선택할 수 있도록 합니다:
use function Laravel\Prompts\multisearch;

$ids = multisearch(
    'Search for users who should receive the mail',
    fn (string $value) => strlen($value) > 0
        ? User::whereLike('name', "%{$value}%")->pluck('name', 'id')->all()
        : []
);
클로저는 사용자가 지금까지 입력한 텍스트를 받게 되며 옵션 배열을 반환해야 합니다. 연관 배열을 반환하면 선택된 옵션의 키가 반환되고, 그렇지 않으면 값이 대신 반환됩니다.
값을 반환하려는 배열을 필터링할 때는 배열이 연관 배열이 되지 않도록 array_values 함수나 values 컬렉션 메서드를 사용해야 합니다:
$names = collect(['Taylor', 'Abigail']);

$selected = multisearch(
    label: 'Search for users who should receive the mail',
    options: fn (string $value) => $names
        ->filter(fn ($name) => Str::contains($name, $value, ignoreCase: true))
        ->values()
        ->all(),
);
자리 표시자 텍스트와 정보 힌트를 포함할 수도 있습니다:
$ids = multisearch(
    label: 'Search for users who should receive the mail',
    placeholder: 'E.g. Taylor Otwell',
    options: fn (string $value) => strlen($value) > 0
        ? User::whereLike('name', "%{$value}%")->pluck('name', 'id')->all()
        : [],
    hint: 'The user will receive an email immediately.'
);
목록이 스크롤되기 시작하기 전에 최대 다섯 가지 옵션이 표시됩니다. scroll 인수를 제공하여 이를 사용자 지정할 수 있습니다:
$ids = multisearch(
    label: 'Search for the users that should receive the mail',
    options: fn (string $value) => strlen($value) > 0
        ? User::whereLike('name', "%{$value}%")->pluck('name', 'id')->all()
        : [],
    scroll: 10
);
부가 정보
info 인수는 현재 강조 표시된 옵션에 대한 추가 정보를 표시하는 데 사용할 수 있습니다. 클로저가 제공되면, 클로저는 현재 강조 표시된 옵션의 값을 받고 문자열 또는 null를 반환해야 합니다:
$ids = multisearch(
    label: 'Search for the users that should receive the mail',
    options: fn (string $value) => strlen($value) > 0
        ? User::whereLike('name', "%{$value}%")->pluck('name', 'id')->all()
        : [],
    info: fn (int $userId) => User::find($userId)?->email
);
값 요구하기
기본적으로 사용자는 0개 이상의 옵션을 선택할 수 있습니다. 대신 하나 이상의 옵션을 강제하려면 required 인수를 전달할 수 있습니다:
$ids = multisearch(
    label: 'Search for the users that should receive the mail',
    options: fn (string $value) => strlen($value) > 0
        ? User::whereLike('name', "%{$value}%")->pluck('name', 'id')->all()
        : [],
    required: true
);
검증 메시지를 사용자 지정하고 싶다면 required 인수에 문자열을 제공할 수도 있습니다:
$ids = multisearch(
    label: 'Search for the users that should receive the mail',
    options: fn (string $value) => strlen($value) > 0
        ? User::whereLike('name', "%{$value}%")->pluck('name', 'id')->all()
        : [],
    required: 'You must select at least one user.'
);
추가 검증
추가 검증 로직을 수행하고 싶다면, validate 인수에 클로저를 전달할 수 있습니다:
$ids = multisearch(
    label: 'Search for the users that should receive the mail',
    options: fn (string $value) => strlen($value) > 0
        ? User::whereLike('name', "%{$value}%")->pluck('name', 'id')->all()
        : [],
    validate: function (array $values) {
        $optedOut = User::whereLike('name', '%a%')->findMany($values);

        if ($optedOut->isNotEmpty()) {
            return $optedOut->pluck('name')->join(', ', ', and ').' have opted out.';
        }
    }
);
options 클로저가 연관 배열을 반환하면, 클로저는 선택된 키들을 받게 되며, 그렇지 않으면 선택된 값들을 받게 됩니다. 클로저는 오류 메시지를 반환할 수 있으며, 검증이 통과하면 null를 반환할 수 있습니다.
일시 정지
pause 함수는 사용자에게 정보성 문구를 표시하고 Enter / Return 키를 눌러 진행 여부를 확인하도록 기다리는 데 사용할 수 있습니다:
use function Laravel\Prompts\pause;

pause('Press ENTER to continue.');
자동완성
autocomplete 함수는 가능한 선택 사항에 대한 인라인 자동완성을 제공하는 데 사용할 수 있습니다. 사용자가 입력할 때, 입력과 일치하는 제안이 그림자 텍스트로 나타나며, 이를 Tab 키 또는 오른쪽 화살표 키를 눌러 수락할 수 있습니다:
use function Laravel\Prompts\autocomplete;

$name = autocomplete(
    label: 'What is your name?',
    options: ['Taylor', 'Dayle', 'Jess', 'Nuno', 'Tim']
);
자리 표시자 텍스트, 기본값 및 정보 제공 힌트를 포함할 수도 있습니다:
$name = autocomplete(
    label: 'What is your name?',
    options: ['Taylor', 'Dayle', 'Jess', 'Nuno', 'Tim'],
    placeholder: 'E.g. Taylor',
    default: $user?->name,
    hint: 'Use tab to accept, up/down to cycle.'
);
동적 옵션
사용자의 입력에 따라 옵션을 동적으로 생성하기 위해 클로저를 전달할 수도 있습니다. 클로저는 사용자가 문자를 입력할 때마다 호출되며 자동 완성을 위한 옵션 배열을 반환해야 합니다:
$file = autocomplete(
    label: 'Which file?',
    options: fn (string $value) => collect($files)
        ->filter(fn ($file) => str_starts_with(strtolower($file), strtolower($value)))
        ->values()
        ->all(),
);
필수 값
값을 입력해야 하는 경우, required 인수를 전달할 수 있습니다:
$name = autocomplete(
    label: 'What is your name?',
    options: ['Taylor', 'Dayle', 'Jess', 'Nuno', 'Tim'],
    required: true
);
검증 메시지를 사용자 정의하고 싶다면 문자열을 전달할 수도 있습니다:
$name = autocomplete(
    label: 'What is your name?',
    options: ['Taylor', 'Dayle', 'Jess', 'Nuno', 'Tim'],
    required: 'Your name is required.'
);
추가 검증
마지막으로, 추가 검증 로직을 수행하고 싶다면 validate 인수에 클로저를 전달할 수 있습니다:
$name = autocomplete(
    label: 'What is your name?',
    options: ['Taylor', 'Dayle', 'Jess', 'Nuno', 'Tim'],
    validate: fn (string $value) => match (true) {
        strlen($value) < 3 => 'The name must be at least 3 characters.',
        strlen($value) > 255 => 'The name must not exceed 255 characters.',
        default => null
    }
);
클로저는 입력된 값을 받게 되며, 오류 메시지를 반환하거나, 검증이 통과하면 null를 반환할 수 있습니다.
검증 전 입력 변환
때때로 검증이 이루어지기 전에 프롬프트 입력을 변환하고 싶을 수 있습니다. 예를 들어, 제공된 문자열에서 공백을 제거하고자 할 수 있습니다. 이를 위해, 많은 프롬프트 함수는 transform 인수를 제공하며, 이 인수는 클로저를 받습니다:
$name = text(
    label: 'What is your name?',
    transform: fn (string $value) => trim($value),
    validate: fn (string $value) => match (true) {
        strlen($value) < 3 => 'The name must be at least 3 characters.',
        strlen($value) > 255 => 'The name must not exceed 255 characters.',
        default => null
    }
);
양식
종종 여러 프롬프트가 순차적으로 표시되어 추가 작업을 수행하기 전에 정보를 수집하게 됩니다. 사용자가 작성할 프롬프트를 그룹화된 세트로 만들기 위해 form 기능을 사용할 수 있습니다:
use function Laravel\Prompts\form;

$responses = form()
    ->text('What is your name?', required: true)
    ->password('What is your password?', validate: ['password' => 'min:8'])
    ->confirm('Do you accept the terms?')
    ->submit();
submit 메서드는 폼의 모든 프롬프트 응답을 포함하는 숫자 인덱스 배열을 반환합니다. 그러나 name 인수를 통해 각 프롬프트에 이름을 제공할 수 있습니다. 이름이 제공되면, 해당 이름이 지정된 프롬프트의 응답을 그 이름으로 접근할 수 있습니다:
use App\Models\User;
use function Laravel\Prompts\form;

$responses = form()
    ->text('What is your name?', required: true, name: 'name')
    ->password(
        label: 'What is your password?',
        validate: ['password' => 'min:8'],
        name: 'password'
    )
    ->confirm('Do you accept the terms?')
    ->submit();

User::create([
    'name' => $responses['name'],
    'password' => $responses['password'],
]);
form 기능을 사용하는 주요 이점은 사용자가 CTRL + U를 통해 양식에서 이전 프롬프트로 돌아갈 수 있다는 점입니다. 이를 통해 사용자는 전체 양식을 취소하고 다시 시작할 필요 없이 실수를 수정하거나 선택 사항을 변경할 수 있습니다.
양식에서 프롬프트를 보다 세밀하게 제어해야 하는 경우, 프롬프트 함수를 직접 호출하는 대신 add 메서드를 호출할 수 있습니다. add 메서드는 사용자가 이전에 제공한 모든 응답을 전달받습니다:
use function Laravel\Prompts\form;
use function Laravel\Prompts\outro;
use function Laravel\Prompts\text;

$responses = form()
    ->text('What is your name?', required: true, name: 'name')
    ->add(function ($responses) {
        return text("How old are you, {$responses['name']}?");
    }, name: 'age')
    ->submit();

outro("Your name is {$responses['name']} and you are {$responses['age']} years old.");
정보 메시지
note, info, warning, error, 그리고 alert 함수는 정보 메시지를 표시하는 데 사용할 수 있습니다:
use function Laravel\Prompts\info;

info('Package installed successfully.');
호출
callout 함수는 레이블과 내용을 포함한 박스 메시지를 표시합니다. 호출은 배포 요약, 오류 세부 정보 또는 상태 업데이트와 같이 눈에 띄어야 하는 중요한 정보를 표시하는 데 유용합니다:
use function Laravel\Prompts\callout;

callout(
    label: 'Environment Configured',
    content: 'Your application is running in production mode with 4 workers.',
);
호출(Callout)의 시각적 스타일을 변경하려면 type 인수로 warning 또는 error를 전달할 수 있습니다:
callout(
    label: 'Deprecation Notice',
    content: 'The `--prefer-stable` flag will be removed in v4.0. Use `--stability=stable` instead.',
    type: 'warning',
);

callout(
    label: 'Database Connection Failed',
    content: 'Could not connect to MySQL on 127.0.0.1:3306.',
    type: 'error',
);
info 인수는 호출란에 바닥글 행을 추가하며, 이는 ID나 타임스탬프와 같은 메타데이터를 표시할 때 유용합니다:
callout(
    label: 'Deployment Summary',
    content: 'Your application was deployed to production.',
    info: 'deploy-id: d4f8a2c',
);
풍부한 콘텐츠
문자열을 전달하는 대신, 문자열과 요소의 배열을 전달하여 풍부하고 구조화된 호출을 만들 수 있습니다. Element 클래스는 제목, 글머리 기호 목록, 번호 매기기 목록, 키-값 목록 및 링크를 생성하기 위한 팩토리 메서드를 제공합니다:
use Laravel\Prompts\Elements\Element;

use function Laravel\Prompts\callout;

callout('Deployment Summary', [
    'Your application was deployed to production at 2024-03-15 14:32 UTC.',
    Element::heading('What Changed'),
    Element::bulletedList([
        'Migrated 3 pending database migrations',
        'Cleared and rebuilt route cache',
        'Restarted 4 queue workers',
    ]),
    Element::heading('Next Steps'),
    Element::numberedList([
        'Verify the health check endpoint at /up',
        'Monitor error rates for the next 15 minutes',
        'Confirm background jobs are processing',
    ]),
]);
라벨이 지정된 데이터를 표시하려면 Element::keyValueList를 사용할 수도 있습니다:
callout('Database Connection Failed', [
    'Could not connect to the database server.',
    Element::keyValueList([
        'Host' => '127.0.0.1',
        'Port' => '3306',
        'Database' => 'forge',
        'Status' => 'Connection refused',
    ]),
], type: 'error');
Element::link 방법은 OSC 8을 지원하는 터미널에서 클릭 가능한 하이퍼링크를 생성합니다. URL만 제공할 수도 있고, 사용자 지정 레이블과 함께 URL을 제공할 수도 있습니다:
callout('Server Health Check', [
    'Multiple services are reporting degraded performance.',
    Element::heading('Affected Services'),
    'Look here: '.Element::link('https://example.com/health', 'Health Dashboard'),
    Element::link('https://example.com/health'),
]);
레이블이 제공되지 않은 경우, URL 자체가 링크 텍스트로 표시됩니다.
표
table 함수는 여러 행과 열의 데이터를 쉽게 표시할 수 있게 해줍니다. 필요한 것은 단지 표의 열 이름과 데이터를 제공하는 것뿐입니다:
use function Laravel\Prompts\table;

table(
    headers: ['Name', 'Email'],
    rows: User::all(['name', 'email'])->toArray()
);
스핀
spin 함수는 지정된 콜백을 실행하는 동안 선택적 메시지와 함께 스피너를 표시합니다. 이는 진행 중인 프로세스를 나타내며 완료 시 콜백의 결과를 반환합니다:
use function Laravel\Prompts\spin;

$response = spin(
    callback: fn () => Http::get('http://example.com'),
    message: 'Fetching response...'
);
[!WARNING]
spin함수는 스피너를 애니메이션하려면 PCNTL PHP 확장이 필요합니다. 이 확장이 사용 불가능한 경우, 스피너의 정적 버전이 대신 표시됩니다.
진행률 표시줄
장시간 실행되는 작업의 경우, 작업 완료 정도를 사용자에게 알려주는 진행률 표시줄을 표시하는 것이 도움이 될 수 있습니다. progress 함수를 사용하면, Laravel은 진행률 표시줄을 표시하고 주어진 반복 가능한 값에 대해 각 반복마다 진행을 진행합니다:
use function Laravel\Prompts\progress;

$users = progress(
    label: 'Updating users',
    steps: User::all(),
    callback: fn ($user) => $this->performTask($user)
);
progress 함수는 map 함수처럼 작동하며, 콜백의 각 반복에서 반환된 값을 포함하는 배열을 반환합니다.
콜백은 또한 Laravel\Prompts\Progress 인스턴스를 받을 수 있으며, 이를 통해 각 반복에서 레이블과 힌트를 수정할 수 있습니다:
$users = progress(
    label: 'Updating users',
    steps: User::all(),
    callback: function ($user, $progress) {
        $progress
            ->label("Updating {$user->name}")
            ->hint("Created on {$user->created_at}");

        return $this->performTask($user);
    },
    hint: 'This may take some time.'
);
때때로 진행 바가 어떻게 진행되는지에 대해 더 많은 수동 제어가 필요할 수 있습니다. 먼저, 프로세스가 반복할 총 단계 수를 정의합니다. 그런 다음 각 항목을 처리한 후 advance 메서드를 통해 진행 바를 진행시킵니다:
$progress = progress(label: 'Updating users', steps: 10);

$users = User::all();

$progress->start();

foreach ($users as $user) {
    $this->performTask($user);

    $progress->advance();
}

$progress->finish();
작업
task 함수는 주어진 콜백이 실행되는 동안 레이블이 붙은 작업과 스피너 및 스크롤 가능한 실시간 출력 영역을 표시합니다. 이는 의존성 설치나 배포 스크립트와 같은 장기 실행 프로세스를 감싸 실시간으로 진행 상황을 확인하는 데 이상적입니다:
use function Laravel\Prompts\task;

task(
    label: 'Installing dependencies',
    callback: function ($logger) {
        // Long-running process...
    }
);
콜백은 Logger 인스턴스를 받아서 작업의 출력 영역에 로그 라인, 상태 메시지 및 스트리밍 텍스트를 표시하는 데 사용할 수 있습니다.
[!WARNING]
task함수는 스피너를 애니메이션 처리하기 위해 PCNTL PHP 확장이 필요합니다. 이 확장이 사용 불가한 경우, 대신 작업의 정적 버전이 나타납니다.
로그 라인
line 메서드는 단일 로그 라인을 작업의 스크롤 출력 영역에 작성합니다:
task(
    label: 'Installing dependencies',
    callback: function ($logger) {
        $logger->line('Resolving packages...');
        // ...
        $logger->line('Downloading laravel/framework');
        // ...
    }
);
상태 메시지
상태 메시지를 표시하려면 success, warning, error 메서드를 사용할 수 있습니다. 이러한 메시지는 스크롤 로그 영역 위에 안정적이고 강조된 메시지로 나타납니다:
task(
    label: 'Deploying application',
    callback: function ($logger) {
        $logger->line('Pulling latest changes...');
        // ...
        $logger->success('Changes pulled!');

        $logger->line('Running migrations...');
        // ...
        $logger->warning('No new migrations to run.');

        $logger->line('Clearing cache...');
        // ...
        $logger->success('Cache cleared!');
    }
);
레이블 업데이트
label 메서드는 작업이 실행 중일 때 레이블을 업데이트할 수 있게 해줍니다:
task(
    label: 'Starting deployment...',
    callback: function ($logger) {
        $logger->label('Pulling latest changes...');
        // ...
        $logger->label('Running migrations...');
        // ...
        $logger->label('Clearing cache...');
        // ...
    }
);
서브 레이블 표시
subLabel 메서드는 작업의 주 레이블 아래에 희미한 선을 표시하며, 이는 현재 진행 중인 단계와 같은 일시적인 상태를 전달하는 데 유용합니다. 서브 레이블을 지우려면 빈 문자열을 전달하세요:
task(
    label: 'Deploying',
    callback: function ($logger) {
        $logger->subLabel('Building assets...');
        // ...
        $logger->subLabel('Running migrations...');
        // ...
        $logger->subLabel('');
    }
);
subLabel 인수를 통해 초기 하위 라벨을 제공할 수도 있습니다:
task(
    label: 'Deploying',
    callback: function ($logger) {
        // ...
    },
    subLabel: 'Preparing...'
);
스트리밍 텍스트
출력을 점진적으로 생성하는 프로세스, 예를 들어 AI가 생성한 응답의 경우, partial 방법은 텍스트를 단어 단위 또는 청크 단위로 스트리밍할 수 있게 해줍니다. 스트리밍이 완료되면, 출력을 최종화하기 위해 commitPartial를 호출하세요:
task(
    label: 'Generating response...',
    callback: function ($logger) {
        foreach ($words as $word) {
            $logger->partial($word . ' ');
        }

        $logger->commitPartial();
    }
);
출력 제한 사용자 정의
기본적으로 이 작업은 최대 10줄의 스크롤 출력까지 표시합니다. limit 인수를 통해 이를 사용자 정의할 수 있습니다:
task(
    label: 'Installing dependencies',
    callback: function ($logger) {
        // ...
    },
    limit: 20
);
요약 유지
기본적으로, 콜백이 완료되면 작업의 출력은 삭제됩니다. 작업이 완료된 후에도 상태 메시지를 화면에 유지하고 싶다면, keepSummary 인수를 전달할 수 있습니다:
task(
    label: 'Deploying',
    callback: function ($logger) {
        $logger->success('Assets built');
        // ...
        $logger->success('Migrations complete');
    },
    keepSummary: true,
);
스트림
stream 함수는 터미널로 흐르듯 표시되는 텍스트를 보여줍니다. AI 생성 콘텐츠나 점진적으로 도착하는 모든 텍스트를 표시하는 데 적합합니다:
use function Laravel\Prompts\stream;

$stream = stream();

foreach ($words as $word) {
    $stream->append($word . ' ');
    usleep(25_000); // Simulate delay between chunks...
}

$stream->close();
append 메서드는 텍스트를 스트림에 추가하고 점진적으로 페이드 인 효과로 렌더링합니다. 모든 콘텐츠가 스트리밍된 후에는 close 메서드를 호출하여 출력을 완료하고 커서를 복원합니다.
터미널 제목
title 함수는 사용자의 터미널 창이나 탭의 제목을 업데이트합니다:
use function Laravel\Prompts\title;

title('Installing Dependencies');
터미널 제목을 기본값으로 재설정하려면 빈 문자열을 전달하세요:
title('');
터미널 지우기
clear 함수는 사용자의 터미널을 지우는 데 사용될 수 있습니다:
use function Laravel\Prompts\clear;

clear();
Terminal Considerations
Terminal Width
If the length of any label, option, or validation message exceeds the number of “columns” in the user’s terminal, it will be automatically truncated to fit. Consider minimizing the length of these strings if your users may be using narrower terminals. A typically safe maximum length is 74 characters to support an 80-character terminal.
Terminal Height
For any prompts that accept the scroll argument, the configured value will automatically be reduced to fit the height of the user’s terminal, including space for a validation message.
Unsupported Environments and Fallbacks
Laravel Prompts supports macOS, Linux, and Windows with WSL. Due to limitations in the Windows version of PHP, it is not currently possible to use Laravel Prompts on Windows outside of WSL.
For this reason, Laravel Prompts supports falling back to an alternative implementation such as the Symfony Console Question Helper.
[!NOTE] When using Laravel Prompts with the Laravel framework, fallbacks for each prompt have been configured for you and will be automatically enabled in unsupported environments.
Fallback Conditions
If you are not using Laravel or need to customize when the fallback behavior is used, you may pass a boolean to the fallbackWhen static method on the Prompt class:
use Laravel\Prompts\Prompt;

Prompt::fallbackWhen(
    ! $input->isInteractive() || windows_os() || app()->runningUnitTests()
);
백업 동작
Laravel을 사용하지 않거나 백업 동작을 사용자 정의해야 하는 경우, 각 프롬프트 클래스의 fallbackUsing 정적 메서드에 클로저를 전달할 수 있습니다:
use Laravel\Prompts\TextPrompt;
use Symfony\Component\Console\Question\Question;
use Symfony\Component\Console\Style\SymfonyStyle;

TextPrompt::fallbackUsing(function (TextPrompt $prompt) use ($input, $output) {
    $question = (new Question($prompt->label, $prompt->default ?: null))
        ->setValidator(function ($answer) use ($prompt) {
            if ($prompt->required && $answer === null) {
                throw new \RuntimeException(
                    is_string($prompt->required) ? $prompt->required : 'Required.'
                );
            }

            if ($prompt->validate) {
                $error = ($prompt->validate)($answer ?? '');

                if ($error) {
                    throw new \RuntimeException($error);
                }
            }

            return $answer;
        });

    return (new SymfonyStyle($input, $output))
        ->askQuestion($question);
});
각 프롬프트 클래스마다 개별적으로 폴백을 구성해야 합니다. 클로저는 프롬프트 클래스의 인스턴스를 받고 프롬프트에 적합한 타입을 반환해야 합니다.
테스트
Laravel은 명령이 예상된 프롬프트 메시지를 표시하는지 테스트하기 위한 다양한 방법을 제공합니다:```php tab=Pest test(‘report generation’, function () { $this->artisan(‘report:generate’) ->expectsPromptsInfo(‘Welcome to the application!’) ->expectsPromptsWarning(‘This action cannot be undone’) ->expectsPromptsError(‘Something went wrong’) ->expectsPromptsAlert(‘Important notice!’) ->expectsPromptsIntro(‘Starting process…’) ->expectsPromptsOutro(‘Process completed!’) ->expectsPromptsTable( headers: [‘Name’, ‘Email’], rows: [ [‘Taylor Otwell’, ‘taylor@example.com’], [‘Jason Beggs’, ‘jason@example.com’], ] ) ->assertExitCode(0); });
```php tab=PHPUnit
public function test_report_generation(): void
{
    $this->artisan('report:generate')
        ->expectsPromptsInfo('Welcome to the application!')
        ->expectsPromptsWarning('This action cannot be undone')
        ->expectsPromptsError('Something went wrong')
        ->expectsPromptsAlert('Important notice!')
        ->expectsPromptsIntro('Starting process...')
        ->expectsPromptsOutro('Process completed!')
        ->expectsPromptsTable(
            headers: ['Name', 'Email'],
            rows: [
                ['Taylor Otwell', 'taylor@example.com'],
                ['Jason Beggs', 'jason@example.com'],
            ]
        )
        ->assertExitCode(0);
}